Sunday, July 3, 2011

DIY Circle Fringe Scarf and Crop Top (a 2 for 1 deal)

I was looking at one of my favourite Vancouver Fashion Blogs, A Haute Mess, and she had posted up a DIY Fringe Scarf. I seem to be on a DIY binge this weekend, so I had to try it.


Materials: Scissors, old t-shirt

1.       I cut the t-shirt horizontally around the middle.


2.       Then I cut the fringes on the rough-edged side, not the hemmed side
3.     Pull the fringes one by one to make it fringey


4.       Easy Peasy Lemon Squeezy. A fringe circle scarf.
5.       I also cut the sleeves off the top and made it into a crop top I can use for dance class!

Saturday, July 2, 2011

DIY Feather Earring

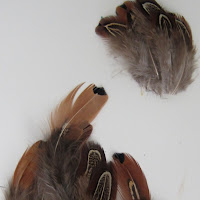
I had lots (and I mean LOTS) of feathers left from the bag I bought from Michael's to make the feather headband so I might as well make some earrings.


Materials: Wire, Feather, beads (make sure they fit the feather), a hook earring


1.       Cut the wire to the length of the earring you want plus a little more so that you can coil the wire to secure. Coil the wire around the feather about  1-2cm from the end of the feather


2.       Slip the beads down the wire and onto the feather.  The number of beads is up to you.
3.       On the last bead, I secured it by pulling the wire through the bottom of the bead up. (Click on the picture, for a better idea of what it looks like)


4.       Attach the wire to the hook earring and coil the wire around itself a few times to secure.


5.       A feather earring!!

DIY Feather Headband

So I've wanted a feather headband for a while now... ever since I saw them a a local craft market. So I decided it was time to make it myself (with the itsy-bitsiest help from my sister.............)

Materials: feathers, headband, scrap fabric, soft cardboard or stiff felt, hot glue (I’m just stunning with my Love Glue Gunning), scissors.


1.        I didn’t have a nice headband so I used an old one and took the original fabric (black with rainbow stars!) off.  And then I cut off long strips of scrap fabric. You can skip this step and the next if you already have a nice headband.


2.       I started wrapping the headband with the strips while hot-gluing the top part of the headband. (I didn’t hot-glue the bottom because it might become bumpy and sit uncomfortably on my head).


 3.       While I set the headband aside to dry off and set, I sorted out a bag of feathers I got from Michael’s. I sorted by size and the kinds of feather I wanted.


4.       I cut a piece of soft cardboard into the general shape I wanted to set the feather (see picture). Then I wrapped it in the scrap fabric and glued it together. You can probably skip this step if you have a piece of stiff felt, which I didn't have at the time.


5.       I hot-glued the longer feathers on the fabric-covered cardboard first.


6.       Then it’s just a matter of layering the feathers into the shape and look you want.


7.       When the feather piece is done, hot glue onto headband!


8.       Voila! You're a bird!


Cost: The only thing I had to buy were the bag of feathers, which cost $2.50 after the 50% off coupon at Michael’s.